Checklist for sick or bad Sprouts
The Checklist for Sick or bad Sprouts show you the several different reasons for sick, bad or rotten sprouts. This way you can correct the issue and grow delicious Sprouts again.
Bad, rotten or moldy sprouts?
The Checklist show you why your Sprouts or Microgreens do not grow well.
Find the issue and learn the solution:

Why do Sprouts go bad?
There is often a specific reason, why your Sprouts go bad. In 99% of cases the reason is bacteria in the soaking glass, water og sprouter.
A sprout is full of antioxidants. It is to support the vulnerable, young plant’s first days of growth. This is necessary because a plant out in nature is constantly attacked by bacteria and fungi.
Since your organic sprout seeds from FRESH SPROUT are natural seeds – that is, not genetically modified – the plant contains the completely naturally high level of antioxidants that it has from nature.
Sometimes the plant gets sick anyway. Most often the reason is bacteria due to lack of hygiene in the handling of the seeds, soaking or cultivation. But it may have other reasons, which you can see in the checklist below. The good news is that once you correct the cause of the imbalance, you will once again be able to harvest crisp, healthy sprouts.

Poor germination percentage
A sprout can only be as healthy as the seed itself. Seeds from FRESH SPROUTS are purchased from Europe’s leading supplier of sprouting seeds. My suppliers guarantee the seeds’ germination percentage.
When I receive the seeds, I also take a sample myself for a germination test. Only if I am satisfied will I start selling the seeds. I repeat the germination test of the seeds every month thereafter. I do this to ensure that you always buy seeds with high germination capacity from me.
However, it may happen that conditions during transport to you have affected the seeds. Or perhaps your cultivation gives an unexpectedly low germination percentage. Please feel welcome to contact me so I may assist you to find the reason or compensate your purchase.

Poor seed germination rate
When you buy your sprouting seeds, they are naturally dry and thus dormant. You break dormancy and start the germination by soaking the seeds in clean, cool drinking water in a completely clean glass.
Each type of seed requires a different soaking time. You can see the soaking time on your FRESH SPROUT seed bags.
It is important that you observe the recommended soaking time. If the seeds are left for too short a time, they will not absorb enough water and will germinate unevenly or not at all.
Conversely, if the seeds lie in water for too long, the seeds begin to ferment. It is just as bad for your seeds as too short soaking. You can read more about that in the next section.

Foam in the glass while soaking
There can be three reasons for foam forming in the glass you use for soaking the seeds:
1) The glass was not completely clean before you soaked the seeds. It is very important that you wash the glass with a completely clean sponge or brush, which you only use for your glass for soaking and for the sprouting tray. Then you will not transfer unwanted bacteria to your seeds.
2) Insects may have ‘visited’ your glass while soaking. You must discard the seeds in this case.
3) If the seeds are soaked for too long they start to ferment. It is very unhealthy for the seeds and will destroy the ability of the seeds to germinate. You can see the optimal soaking time on all seed bags from FRESH SPROUTS. However, the recommended times only apply for seeds in this shop.
4) The glass is too hot, so the seeds start to ferment. The glass must be placed on the kitchen table in the shade. The same place where you also place your sprout container.
You can try to grow seeds that have had a little foam on the water. However, you must rinse very thoroughly after soaking and make sure that the seeds/sprouts do not go bad in the sprouting tray.

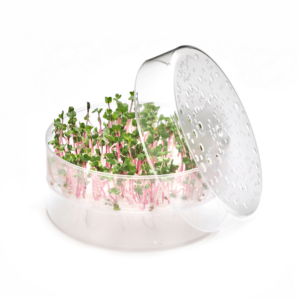
Sprouts mold with dense white hairs
It is very unusual for your sprouts grown from high quality seeds to actually mold. Often the mold are root hairs – taproots – branched roots. Sprouts with root hairs are: Radish, Broccoli, Colza, Sunflower, Kale, Cabbage, Corn.
Root hairs are very dense roots that look confusingly like white mold. They are especially evident from day 2-4 of cultivation. Roots with root hairs can be eaten as long as they are white and have a distinct smell of fresh greens.
You can double check that it is root hair by looking at:
- Are your sprouted seeds of good quality and are they complete with whole shells?
- Are the seeds in one even layer in the sprouter so that water can drain off?
- Has your sprouter been cleaned with a completely clean sponge/brush so that you have not transferred fungi and bacteria to the container?
- Do your sprouts smell fresh – albeit strongly of fresh greens?
If you can nod yes to the four points above, then the mold is with 99% certainty not mold but root hair.

Seeds and sprouts go smelly
Sickness in the sprouter can happen for two reasons:
- The sprouter is not properly clean before you start cultivation.
- The sprouter is homemade from a material that is not suitable for the constant influence of moisture.
- The seeds have not been sorted before you started the cultivation.
If you have the first two points under control, the trick is to check the seeds. It is important that you check and sort the seeds before/after soaking. Always remove any damaged seeds. Seeds can easily have varying colors and be healthy, but if a seed is completely black and sunken, it must be removed.
Sorting is important as diseased seeds rot during growth. This creates a bad environment in the sprout tray, which infects otherwise healthy sprouts.
There will always be a few broken or damaged seeds in even the best seed mixes. Therefore, you should always check before/after soaking.

Mold in seeds and sprout trays
Actual mold – not the above mentioned root hairs – in the sprouter is caused by poor hygiene around the seeds and tray. Fortunately, the solution is easy:
- Check that your sprouting seeds are of good quality and that they have not expired.
- Make sure you store the seeds correctly. They must be kept dark and slightly cool, but not in the refrigerator. If the seeds are too cool, condensation will form inside the bag – this will surely result in moldy seeds.
- Check that the seeds smell good and are whole when you pour them out to soak. If you use a spoon for dosing, the spoon must be completely clean and completely dry. Moisture in the seed bag causes moldy seeds.
- Check that the germination tray is completely clean before your cultivation. Always clean it with regular unscented dish soap and a clean sponge/brush that you only use for the tray. This is how you do not transfer bacteria and fungal spores to your sprouting tray.
In the next section, I show you how to clean your sprouter so that you have a fresh foundation for success with the next batch of sprouts.
How to clean your sprouter after bad Sprouts
Have you had rotten Sprouts, moldy seeds or sick Sprouts in your sprouter? Then it is very important that you clean the sprouting tray completely before the next cultivation. Because if you don’t clean the container thoroughly, your next seeds and sprouts will most likely be bad too.
How to clean your sprouter
- Remove all remaining plant parts from your sprouter.
- Wash all parts of your sprouter thoroughly with unscented dish soap and a clean sponge or brush. The sponge or brush need to be dedicated only to clean your sprouter in order to prevent unwanted bacteria transfered via the sponge or brush.
- Rinse with clean, warm water to remove all soap.
- Air dry and your sprout tray is now completely clean of all organic material and ready for your next round of healthy sprouts.
How to clean a SproutPearl sprouter
If you cultivate in a SproutPearl sprouter from FRESH SPROUTS, then you may choose to clean it extra well after the above explained washing.
- Mix 3% hydrogen peroxide (H2O2) with clean, cool water in a glass tray. After mixing the hydrogen peroxide should be no stronger than 0.3%. This means that a 3% hydrogen peroxide must be mixed with cold water in a ratio of 1:10
- Put the clean SproutPearl sprouter in the mixture of water and hydrogen peroxide for 15 minutes.
- You will see bubbles forming on the tray during the 15 minutes. It is the hydrogen that works on organic material and oxygenates away bacteria.
- Rinse with clean, cold water. Your sprout tray is now completely clean of all organic material and ready for your next round of sprouts.
TIP You should buy 3% hydrogen peroxide (H2O2) in a pharmacy to ensure the quality.
Sprout leaves have flaws
Sprouting seeds can in principle last for several years if they are stored optimally. The best storage of sprouted seeds is dark, dry, in an airtight container without condensation at up to 19 °C.
Your seeds will always try to germinate, but you can tell old seeds by the fact that all the seeds grow poorly and all the sprouts have ‘flaws’ in their leaves.
You can still eat sprouts from old seeds. They are just far more difficult to grow into healthy plants.
Black leaves and/or roots
A sprout needs to be constantly slightly moist, but it cannot tolerate being directly wet for long periods of time either. This is because the sprout breathes as all living plants and therefore needs oxygen.
If the sprout is too wet, it cannot breathe and suffocates. It appears as black leaves, stems and/or roots.
The solution is that your sprouts do not grow too close and you drain the sprout tray and bottom after each rinse.

Sprout grow smelly and soggy
It is important that there is a balance between the size of the sprouter and the amount of sprouts. If there are too few sprouts in the container, the plants easily dry out and wither. If there are too many sprouts, the sprouts have a hard time getting rid of excess moisture and heat, causing them to rot and smell.
There is a dosage overview in all manuals for sprouters bought from FRESH SPROUTS. If you have to choose, then too few sprouts per sprouter is better than too many.
You should not eat sprouts that smell bad. Discard them and clean your sprouter extra thoroughly, so that the next batch of sprouts get a healthy basis to grow well – If necessary, clean the sprouter as described above.
Sprouts go bad every time
A clean environment is the alpha and omega for your sprouts.
Sprouts are naturally full of antioxidants which support the sprout’s life and survival against the bacteria that are all around us. But if there are too many bacteria, a sprout cannot keep them at bay. Then a sprout gets sick.
It is therefore important that you wash the sprout tray after each round of sprouts with a completely clean sponge/brush that you only use for your sprout tray and perfume-free dish soap. Allow the tray to air dry or dry with a clean tea towel.
If you have had disease in your sprout container, you should clean it extra thoroughly to clean away all bacteria as described above.

You must clean the Sprouter very well after each use to keep a high standard of hygiene in it.
Brown spots on otherwise white roots
Do you grow sprouts for leaves in trays with grooves?
If the roots of your sprouts grow down through the grooves in your sprouting tray, they may turn a little brown where they are stuck in the groove. It’s not a real problem. The advantages of them sticking to the roots are more than the disadvantages. When sprouts grow upright:
- they evaporate excess moisture more easily and it provides a healthier environment around the sprouts.
- all the sprouts receive the same amount of light, resulting in uniform maturity.
To prevent the roots from breaking during cultivation, you should rinse gently. If necessary, put an water faucet aerator on your tap.
When you are ready to harvest the mature sprouts, you can also cut off the roots from below. Then it is easy to pull the sprouts out of the tray.
Roots are stuck in the sprout tray
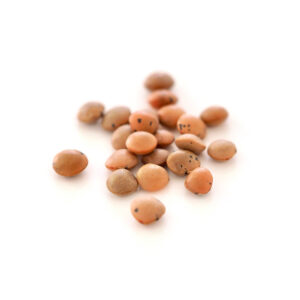
Do you grow beans, lentils, peas and chickpeas in sprouting trays with grooves?
Then you are probably frustrated that:
- The roots quickly grow down through the small grooves.
- Once the roots have grown in the grooves for a day, they are stuck!
- The roots go brown where they are stuck in the tray.
- You can’t pull up the sprouts without breaking the roots.
There are two tricks: You can either gently shake the sprouting tray every time you rinse. This causes them to roll around between each other. This way the roots do not grow firmly stuck in the grooves.
Or you can harvest earlier. Beans and chickpeas should only have 1,5 cm long roots. Lentils and peas must have 0.5-1 cm long roots. When the root is so short, these sprouts also taste best.
Short, stunted roots on sprouts
If the water from your faucet is drinkable then you can rinse the sprouts with cool water directly from the faucet. You don’t have to worry about lime in the water. It does not affect your sprouts.
On the other hand, sprouts cannot tolerate the bacteria that come from your mouth. So never drink from the glass you use for soaking and don’t touch the kitchen tap with your lips.
You know your sprouts have gotten bacteria from your mouth if all the sprouts in the tray become stunted and have oddly short roots, even though the stem is long.
Squashed, flattened sprouts
Sprouts love a quiet rinse in the morning and evening.
If the water, on the other hand, splashes down on the sprouts, so that the sprouts jump around, or the stems are masted under the water, you will soon get a sprout tray full of sick, rotten sprouts.
The solution is that you rinse more gently and turn down the water ray. Or you can put a water faucet aerator on the tap. The aerator lets you set the water to an oxygen-rich and soft concentrated jet or even gentler, scattered jets. All sprouts love this kind of gentle water rays.
Dry and then rotten sprouts
Sprouts need to be constantly slightly moist in order to live. If you let your sprouts dry out even the slightest bit between rinsings, the sprout will completely or partially wither. This makes the sprout vulnerable to bacteria…and then they soon go bad.
Since a plant will always try to grow, even if it has ‘been weakened’, you will rarely see the sprout go bad right away. But it is now growing under unnecessarily difficult conditions.
The solution is to rinse your sprouts morning and evening with clean water and grow them in sprout trays that ensure a good environment.
Reasons for dry, withered sprouts
Are you no sure, why your sprouts go dry and wilt? Then here are the most probable reasons for wilted sprouts:
- You rinse less than every morning and evening.
- The rinses are shorter than 10 seconds each time.
- There are too few sprouts in the sprouter.
- The sprouter is not designed well enough.
- The sprouter is in sun or draft.
- The sprouter is too close to an oven or radiator.
Once a sprout has dried out, it can no longer be grown, but will rot in stead.
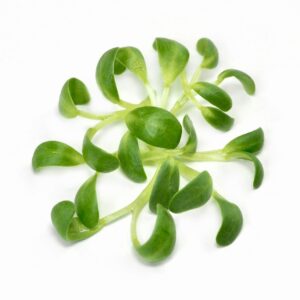
Spindly, thin and colorless sprouts
You get spindly, colorless sprouts when your sprouter is placed too dark.
Sprouts with leaves should be kept bright – but not in direct sun – as the plants use the light to form color in their leaves. If a leafy sprout grows in dark shade, it will bet on getting more light by growing longer, spindly stems. The solution is to simply move the sprouter closer to a light source.
Sprouts of peas, lentils, beans and chickpeas, on the other hand, should be grown in the shade, as they must be eaten before they form leaves.
Withered and tasteless Sprouts
You will get wilted, tasteless sprouts if you let them grow too long.
A sprout lives off the nutrition in their seed. The seed is only intended as a starter package from nature’s side. Therefore, there is only enough nutrition in the seed to keep the sprout alive from the time it begins to sprout until it has borne leaves for a short week.
After 5-6 days with leaves, the nutrition is used up. The sprout loses color, flavor and slowly withers. So enjoy your sprouts in your food when they are ready to be eaten.
Broken, rotten sprouts
Broken sprouts will rot rather than grow into crisp, delicious sprouts.
A sprout’s fine roots, stems and leaves are fragile and break easily. Therefore, sprouts need to grow undisturbed.
You can obtain this by gently rinsing with gentle water jets. Also gently move the sprouter around. If seeds and sprouts are to be distributed in the container, let the gentle jets of water move the sprouts rather than using your fingers or shaking hard. Treat sprouts as your best friends.
Sprouts only grow once
With the exception of Pea Shoots, you can only harvest your Sprouts and Microgreens once from each seed.
The trick to being able to harvest several times from your Pea Shoots is to cut in the right place. First, let the pea shoots grow until they have several side shoots. You can then harvest the top shoots by cutting off the stem above the lower side shoot.
After a few days, a new stem will appear on the pea shoot, and you can then harvest it again.
Did you not find the solution?
Did you not find the reason for your Sprouts going bad in the list?
If you have bought your products in my shop, you are welcome to contact me. I will be glad to help you find the reason for your issue with your sprouts.
Please write to me via the contact formula. I will answer a.s.a.p.
Many smiles
Miriam Sommer
Are you ready to try again?


Questions from other readers
You get healthy sprouts by growing the plants in clean, well-designed sprout containers. Place the container on your clean kitchen counter in light but away from hot sun. Rinse with clean, cold water morning and evening.
Typically, seeds or sprouts get sick or go bad due to poor hygiene or unclean sprout trays. Or if you forget to rinse them every morning and evening and drain excess water from the container.
No. Once the sprouts are wilted or smell bad, you should not eat them. Instead, clean the sprout tray thoroughly and start a new round of sprouts.
After each round of sprouts, you should:
1) Remove all plant parts from the sprout container.
2) Soak the container in clean warm water to soak up any remains of plants.
3) Wash all the parts with unscented, organic dish soap and a clean brush that you only use for that purpose. That way you can avoid transferring unwanted bacteria to the sprout container from leftover food stuck to the brush.
4) Rinse the soap away and your sprout container is immediately ready for the next round of sprouts.